Disable Rt Click

Sunday, December 29, 2013

Macro Colors


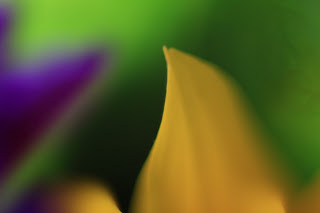
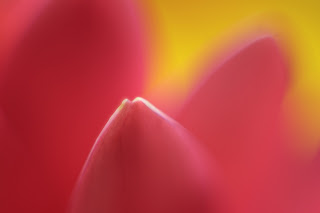
 This was a fun project!  My goal was to create macro images that were based more on color, design, and  composition rather that exacting detail.  To do this I used a Canon FD manual lens set at 1.8, mounted on a 3 set of Fotodiox Extension tubes equalling 49mm.  This was mounted on my Canon EOS M.  The camera was mounted on a Macro slide focusing device, then on a tripod.  Focus was first achieved with the lens and then fine tuned with the Macro Slide.  DOF is extremely narrow when the lens is this close to the subject ( about an inch) ISO was 800 and shutter at  1/50 sec using soft window light as the primary light source.  Because the tubes cause 3-4 stops of light loss, seeing the image brightly enough on the live view viewfinder required a shutter speed of .5 seconds for set up.  Once I was happy with what I saw, I set the shutter speed to 1/50 to capture the image.

There are many ways to create macro images: extension tubes, macro lenses, close up filters and reversing a lens with an adapter.  The most expensive would be a good prime macro, the least a set of these non-coupled aluminum tubes or the lens reversal ring. This is a great rainy day project!

Enjoy, Jeff
Sunday, December 8, 2013

Window Light


Portrait Lighting, that is what it all about.  There are so many ways to light a portrait.  One of the simplest ways is to use light from a Northern window when it is cloudy outside.  The light is soft and smooth.  Here I positioned Abe, our 7 year old grandson at a 30 degree angle from the window to create a little shadow on the left side of his face.  Of course this was not a studio shot where background is controlled, but far better than unplanned snapshot or with direct flash.  I metered off his face and used AWB on the Canon EOS M with a 22mm lens (35mm focal length in film format).  Enjoy, Jeff


Thursday, November 21, 2013

Portrait


Gorilla  with Platinum toning.  Again, I used Topaz Adjust B&W 2.0 to convert this image taken at the Bronx Zoo.  Shot in color with a Canon IS SX40 camera, through glass,  I thought it was a stunning portrait of this magnificent animal.  I always liked the color image, but this effect really grabs me.  I did some 25% dodging in the central part of the face and created a slight vignette to darken the shoulders and background. The most important part of the image is the face, and this technique emphasizes that.  Enjoy, Jeff


Wednesday, November 20, 2013

Topaz Adjust BW Effects 2.0


Saratoga Motion shot with a 
KONICA MINOLTA DIGITAL CAMERA 7D

This is my first color conversion using Topaz Adjust BW conversion software.  It plugs into PS 3 or higher or in to later versions of PS Elements.  It was really a pleasure to use with as typical of Topaz products, endless creative possibilities.  I toned this platinum with a slight vignette.  Enjoy, Jeff

Saturday, November 16, 2013

Star Landscape Photography-How to do it


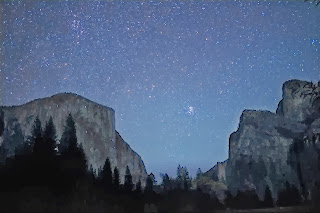
 This is Yosemite Valley view, photographed last week about 730PM.  The tricks to getting good star photography with out star trails are these:

Use a wide angle fast lens 10-30 mm, ideally 2.8 or faster
Use a camera that allows you to shoot at 800 ISO to 3200 ISO with little to no noise
Include the landscape in the scene
Expose at widest aperture and VIP,  prefocus to a distant object manually as light is getting dim, and turn off auto focus to lock the focus. Do not touch the lens after that
Expose for about 10-30 sec, depending on the lens.
To avoid star trails divide the Focal length of the lens into 600 to give you the maximum exposure time to avoid star trails. Example, a 20mm lens allows up to 30 sec exposure.  Bracket times/ISO's to see the best shot.
Use a tripod. Fire the shutter with a cable, wireless or self-timer to avoid camera shake
A tungsten white balance keeps the sky blue
Turn off long exposure noise reduction

In this image, El Capitan is on the left with night climbers and their head lamps.

Camera was a Canon EOS M with a 22mm pancake lens.  ISO 1600, f2, 15 second exposure, fired with 2 sec self timer.

Enjoy, Jeff

Saturday, November 9, 2013

Yosemite

These were shot with the iPhone 5 this week. Apps used for the color images were true HDR. For the monochrome , 645
PRO. A little editing was done in Photowizard, which
Is a great editing Application. Met some great people
out there!!

Yosemite

Wednesday, October 23, 2013

Fall


 Shot today with the Canon EOS M, a terrific 18mp, CMOS APS-C mirror-less camera.  Small in body but a DSLR in capability. LCD touchscreen controls which I really like.

 The Canon 18-55 IS lens was used.  Images lightly edited in Photoshop.  Enjoy, Jeff


Monday, October 21, 2013

More Coney Island

Same technique. Note my shadow at the bottom. I
Think it adds a cool element

Sunday, October 20, 2013

Coney Island

We went to visit Jeanette's sister in Brooklyn this weekend and early this morning I took a ride over to Coney Island to see what the boardwalk looked like. Of course the rides were closed but nevertheless the sky was bright blue and the signs and so forth were colorful. I thought the best effect would be to use the iPhone in HDR mode with True HDR

Furthermore I applied the wide angle lens of the Olloclip which really made a difference in capturing a much larger scene. I then used the Olloclip App to correct the wide angle distortion.

I was overall very pleased with the results. As usual, much fun! Enjoy, Jeff

Monday, October 14, 2013

Thatcher Park, Albany


Thatcher Park Panorama.  Three images combined in Calico in the IMAC.  Shot with a Nikon D200 with set exposure for all 3 shots and set focal length to allow for a good blend,  Image edited in Photoshop CS.

Enjoy, Jeff


Sunday, October 6, 2013

Mystical Garden

This was shot today with an iPhone 5, first using the application bracket mode, then TrueHDR, then PhotoForge and then finally PhotoWizard for selective masking and brightening of the image. This was a garden seen near New Hope Pennsylvania I came across that had artistic, painterly potential. I hope you enjoy it as much as I have had making it. Jeff

Sunday, September 29, 2013

Charlotte in HDR

Charlotte,NC shot with iPhone 5 with App BRACKET which allows for two fast exposures across the exposure range and then combined and tweaked in TRUE HDR for the final result. Very cool, no ?
Enjoy, Jeff

Sunday, September 22, 2013

HDR CLASSIC AUTOS

Shot today with an iPhone 5, olloclip wide angle lens, gorilla pod tripod, iPhone cable release and processed in TRUE HDR after shooting with Bracket App. The olloclip app was used last to correct wide angle distortion.

Enjoy, Jeff

Saturday, September 14, 2013

Today's Gift


Today was a day of reflection. Noticing these mushrooms in our front yard growing at the base of our weeping willow gave me pause.  They are beautiful, but lethal,  being of the Amanitas species, one cap could kill a man of my size in less than 24 hours.  How could such a harmless looking fungus be so deadly?  Up close, it is beautiful. Note the off white color, the detail of the cap and stem.  This was shot using a Nikon D200 with a Minolta 50mm macro lens on a Tamron Adaptall mount, allowing the Minolta lens to work with the Nikon.  Exposure was done manually and the shot was handheld by me lying on the ground.  I estimate the f stop to be between 5.6 and 8.0.  Lightly edited in iPhoto and PS CS.  Ah, some of you will ask about the red leaf.  It was there in the front, I simply moved it to the back.

Enjoy, Jeff


Thursday, September 12, 2013

The Wonderful World of Candid Portrait Photography

Great article on how to "candid portraits". My techniques are basically the same. Jeff

The Wonderful World of Candid Portrait Photography
http://fstoppers.com/the-wonderful-world-of-candid-portrait-photography

---
Sent from Zite, available for free in the App Store.


  Jeff

Sunday, September 8, 2013

Lake George from Prospect Mountain

One of the greatest tools of the modern iPhone is the ability to create a panorama. This can be done within the camera application or I think better yet, from using another camera application and then stitching the photographs in an application called AutoStitch. For this I use the application camera plus to take five overlapping photographs and then stitched them in AutoStitch. A little bit of cropping and then editing created the final result. Very easy to do and actually a much better result than the in camera panorama that is native to the iPhone.

Saturday, September 7, 2013

Artsy Dancer

Blended two inverted images of the dancer using Image Blender App. Enjoy, Jeff

Bear Clan Pow Wow 2013


This is the second year I went to the Pow Wow.  These folks are willing photo subjects!  Great color, costumes and personalities. The first two images were shot with a Fuji F800 EXR at 500mm. The rest witha Nikon D200 And a Nikkor 18-135 Lens.  WB Auto, ISO 100-400. All edited in iPhoto.  Enjoy, Jeff


Sunday, August 18, 2013

FUJI F800EXR TRIAL


 At 500mm!!


The Fuji F800EXR really solved my need for a pocket 28-500 zoom camera wioth an excellent lens and CMOS sensor.  These are my first shots with it today after golf at Western Turnpike Golf Course in Guilderland.

I am pretty impressed with the AUTO settings, WB, color and clarity.  They were minimally edited in iPhoto.  Enjoy, Jeff

Saturday, August 17, 2013

The Morning Ride

The backlit photograph.

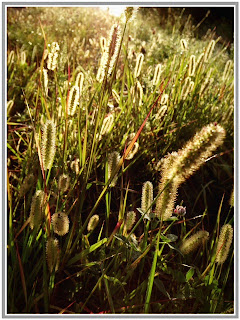
Early morning light with dew is a great opportunity to photograph even the simplest things such as grass or weeds. Notice the backlit effect highlighting and turning something ordinary into what I believe, is beautiful. In choosing to take a backlit photograph the point of exposure is critical, if you want to make a silhouette , you would expose where the light is coming in and everything in front will turn black . You can adjust the degree of blackness and the degree of high lit  edges by adjusting the exposure point

For this image I chose an exposure point toward the bottom third of the image that would allow one to see details in the plants and yet show the backlit subject

Queens Anne's lace field and backlit sun 

This to me has a sort of National Geographic landscape look. I saw this field of Queen Ann's lace partially backlit and the sun rays coming in over the trees in the background. What a great combination of foreground subject and background subject.

And again, I used the iPhone 5 Using camera plus to initially take the photographs, adding a clarity filter, further editing in Laminar with framing. Enjoy, Jeff